I have been advising small community stations in Africa to use the Kodak Zi8 flash based camera. It provides excellent quality images, especially if you use a tripod or monopod to keep it steady. I prefer it to all the offerings from Flip, not only because of the video quality but because of the SOUND. The sound on the Flip cameras is truly awful. The built-in microphones on the Zi8 are OK for ambience (in mono) and emergency situations. But I remember former Kodak PR guru Jeffrey W. Hayzlett explaining at the Zi8 launch at DLD-09 that the most common request from customers was for an external microphone jack. They did that. But which mike to choose? I have seen people using two separate lavelier micophones plugged in parallel via a headphone splitter into the Zi8. But now, I believe I have found a better solution. Darren Nemeth runs an audio business called Giant Squid. He builds small microphones exactly for the purpose. I'm interested because the cost of the microphones (65 US dollars complete) is in proportion to the cost of Zi8 (around US$180 in the US). For an extra 6 dollars he puts a Neutrik Right Angled Gold Plated Plug on the end of the mike cable (bottom of the photo in the insert). I agree with him that Neutrik plugs last longer and seem to fit more snugly into the socket on the camera. The gold plating helps improve the contact quality - because dirt and dust on the plug can end up giving you crackling noises after a while (especially in Africa). Darren doesn't make excessive charges for posting the microphones overseas either, and accepts PayPal. Altogether a good deal.
Sennheiser, Beyer etc. make great stuff, but well beyond the budget of the stations I work with.
I see discussion in some groups that indicates to me confusion around the term stereo. The micrphones above are actually two separate mono microphones wired into a single stereo plug. So you clip one mike on the interviewee and the other one on the interviewer. The Kodak Zi8 puts each mike on either the left or right channel. The confusion arises because Sony makes a single point STEREO lavelier microphone, the Sony ECM-CS10 Stereo Lavalier Microphone. I have tried this but decided against it. You don't need stereo on a single lavelier. The human voice is a single source and this mike ends up adding a lot of extra atmosphere to the recording that does nothing to improve the intelligibility of the interview. In fact, in noisy environments, the internal Kodak microphone ended up doing a better job. The ECM isn't expensive (35 US dollars) but it is not what I want. If you are using a recorder without power built into the microphone socket, you may need to consider the Audio-Technica ATR3350 Omnidirectional Condenser ATR3350 which is mono but with its own small power supply in a small tube which can attach to a belt. This microphone has a really long cord (7 metres) and is powered by a watch battery. The only challenge is that you need to keep a spare battery handy. Although the battery does last quite well, when it goes it does so suddenly. There is no light to indicate the unit is switched on.
So what's the best equipment for storytelling, especially if you're in broadcasting? These are the reports on my safaris. Interested in your road-trip experiences too.
Sunday, August 15, 2010
Saturday, August 14, 2010
Next Steps for this Blog - Check the Urban Fox
Been pondering what to do with this blog. I'd like to share some thoughts with you.
I did some experiments elsewhere with Ning, but decided to discontinue the adventure because of horrendous Chinese spam and my personal uncertainty as to where the Ning platform is going. If they can change the policy to charge for maintaing access to content I have created, then even though the initial price is reasonable, I have no idea what they will change next. So like it or leave it. I left.
But back to this space. I initially used it for posting gadgets and stuff that Caught My Eye at IBC Amsterdam. Since 2008, the amount of relevant audio gadgets has dropped considerably. So I have broadened things to include anything of relevance to the blogger, vodcaster, podcaster on the move.
I'm going to comb through previous postings and select some for updating and revising. I will also add new content, since my kit has changed recently. Some comments, such as a recomendation for the HHB range of FlashMics is hopeless out of date and my in field experiences means I have changed my mind.
But what do you think? Still a need for this particular blog?
In the meantime, do check out the excellent musings from UrbanFox. Christina and David are actively testing kit for the documentary maker and offering some candid advice on whether or not to go the DSLR route. Christina also does some excellent, affordable training courses in the UK which I highly recommend. Look out for her too at the IBC 2010. Great stuff. Honest, practical advice. All with a wry sense of humour that comes from working with stuff to a deadline.
Setting things right on Vimeo
Several people have asked me why I host videos on Vimeo rather than Youtube. The truth is I have experimented with both, but has found more in common with the writers, directors and videographers that are storing their stuff at Vimeo. You definitely need to embed videos elsewhere - just leaving material on Vimeo and hoping people will find it is NOT the way forward. Vimeo has made some recent changes to make it easier to post alerts to Facebook and Twitter and they have a file size limit rather than a time limit of 15 minutes like YouTube. Personally, with 24 hours of video being uploaded to YouTube every minute, I wonder when my stuff is going to get lost in the jungle of great stuff and sheer nonsense.
There is an excellent settings page on Vimeo which gives you the settings you need for best results with your respective video editor. I migrated from Sony Vegas to Final Cut about three years ago and noticed a huge difference in quality if you get the settings right. It is very important to limit the streaming to 5000K otherwise video becomes very jerky.
This is the link you need for Vimeo. I have found it also works for Youtube since they went to HD.
Friday, August 13, 2010
Hardata Software Automation Revisited
This is an updated post because I have recently recommended a couple of stations to install this set of automation software.
I first remember seeing it when I got the complete tour of Argentina's national radio station. This is my second visit - came in 1999 and interviewed people in the English service of Radio Argentina Al Exterior, the overseas service. This time I talked with the people running the various domestic networks. Studios have mothballed the tape decks and record players, now everything comes off the computer using a software package called Hardata that has been made in Argentina (I see most stations using it). Cost is around 1200 US dollars per work-station, considerably less than the European variants. There is a free download to try before you buy (Windows XP and Vista). Haven't seen versions for Windows 7 yet. I find it great because it fits the mixed music and speech formats you find at small stations in Latin America, and the software runs in a number of languages including Spanish, English and French. There's currently a deal on for individual copies at US$299. Doesn't work on a Mac.
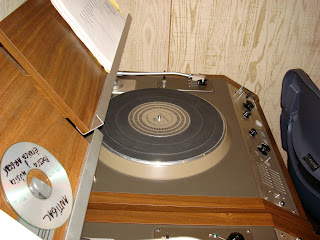
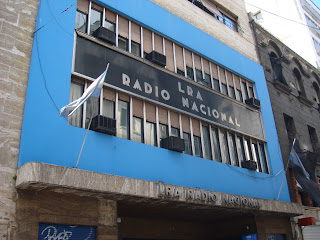
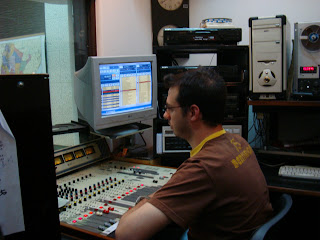
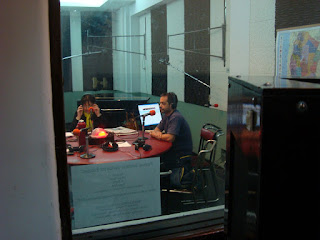
I first remember seeing it when I got the complete tour of Argentina's national radio station. This is my second visit - came in 1999 and interviewed people in the English service of Radio Argentina Al Exterior, the overseas service. This time I talked with the people running the various domestic networks. Studios have mothballed the tape decks and record players, now everything comes off the computer using a software package called Hardata that has been made in Argentina (I see most stations using it). Cost is around 1200 US dollars per work-station, considerably less than the European variants. There is a free download to try before you buy (Windows XP and Vista). Haven't seen versions for Windows 7 yet. I find it great because it fits the mixed music and speech formats you find at small stations in Latin America, and the software runs in a number of languages including Spanish, English and French. There's currently a deal on for individual copies at US$299. Doesn't work on a Mac.


Thursday, August 12, 2010
Making Stunning Stills in Moments

I must confess my software discovery of the month is the new version of Fotomagico 3.5. My records show that I have looked at previous versions, before I realised its Mac only and rejected it. Now that I have switched all my video production from PC to Mac, I have been re-assessing what I required as a basic set. I soon discovered that I needed Final Cut Pro and that time spent with Final Cut Express and iMovie was both a waste of time as well as frustrating.
Now a similar thing is happening when it comes to the production of slideshows. I use slideshows both as a warming up/countdown to keynotes – as well as for trailers to articles I have written. Stills have the ability to create mystique that is totally different to video. Besides, I have 15,000 photos that I have never printed on paper, yet want to share. Correction, I want to share them with music, as a performance or a narrative. I always felt the Photo CD failed because it had no soundtrack.
Radio with Pictures
I am also going to experiment with illustrating some radio shows, now that screens are starting to appear on some of the digital radios in the UK. I have a situation where I have done a radio documentary about a visit to Radio Prague 20 years ago. I have been back several times to Czech radio and taken pictures to show what’s changed. I found that by adding a slideshow to the audio I gave an enhanced experience, with the captions adding text without disturbing the original narration. You can’t do this quickly without the sort of cross media timeline that Fotomagico provides. Still experimenting, but the sharp pictures make the audio into a theatre experience.
Getting it done fast – building a workflow
Originally I thought iPhoto was the simple solution to making a slide show for a backdrop for a conference and awards ceremony. It worked, sort of, but the music didn’t synchronise and I was forced to use standard fades and cross-overs. I played with Apple Keynote, which was great until the sequence got out of step with the music. I was fiddling with the order as the audience was taking their seats. Been there once. Believe me, never again.
So a month ago it was time to look for something else – and that’s when Fotomagico popped up with its version 3.5. I have to say immediately that there are two versions, home and professional. The price difference is significant 25,00 Euro for the home version in Europe, 140 Euro for the Pro. You can compare the two versions on this page. But I have to say the features on the Pro version turn it into very professional cross-media editor and that was the version I am reviewing here.
I need the multiple (3) audio tracks for different language versions. There’s a teleprompter and voiceover function on the Pro, and I like to be able to break the presentation into chapters. But the home version has a lot of features too and there seems to be no difference in the quality for rendering to most platforms. Some options, like the standalone player, only work with the Pro Version. That said, this is a reasonable price for something that saves so much time which-ever version you choose. People in the US are luckier because the prices are slightly cheaper, 29 and 149 dollars respectively. But that's the case with most software.
What I do in a live situation
When I am live on stage, I simply switch to the live presentation format which means there is no waiting for rendering. I slot in a few photos I have taken of the audience coming into the theatre, drop them into pre-planned parts of the sequence, and off it goes. The impact of seeing photos a few minutes old already folded into a professional presentation adds a surprise element which works every time. I couldn’t do it as easily in other programs without worrying about messing things up. I am using JPEGs for this. You can experiment with RAW files but frankly there is not much point for projection. It just slows things down if you have a lot of transitions.
The program warns there will be quite large loss of quality if you export the slides to YouTube, a DVD, to an iPhone, AppleTv or an iPad. But if you’re using a HD-TV or want to share the slides with PC users you will have to put up with some loss in fidelity. But don’t forget the screen size on the iPhone is smaller and frankly I wasn’t too worried. It looked fine. The Pro version allows you to export to a special stand-alone player that does retain the original quality. The presentation will then play on other Macs but not on the PC platform.
Ease of use
Fotomagico is very intuitive, as its name implies. I played with it for a while, watched the demo and then read the manual to see what tips and tricks I’d missed. I like the fact that you have a lot of the 3D effects you get in Keynote, but these are much easier to combine with titles and sync to the music or narration. I found I could use the program without having to have others open – Fotomagico dips into iTunes, Garageband, iPhoto, folders without you having to have the respective programs open. The only point I would like to see in a future version is the ability to sort or filter some of the iTunes folders from within Fotomagico. So I prepare my soundtracks into to special playlist in iTunes and then open that folder in Fotomagico. You can preview tracks in a little player in Fotomagico though.
You can produce a stills sequence much faster in Fotomagico than fiddling around with the motion control in Final Cut Pro. Basically you make the sequence in Fotomagico and this is rendered dynamically into FCP. You really notice the speed saving when you make a mistake (let’s say a spelling mistake in a title) and the fix only takes a matter of seconds. Note that these links allow quick export of the video only. You lay the audio track in Final Cut Pro.
Summary:
It works. I’m hooked and can recommend both the software and support service. But don’t take my word for it. Experiment with the trial version by requesting a temporary licence from Boinx.com.
Wednesday, August 11, 2010
DT 797 PV - Outside Broadcast headset from Beyerdynamic
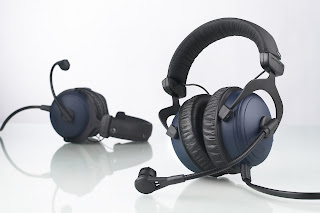
Last year, I bought a pair of Sennheiser headphones HMD 280's with built-in microphone. Why? To be able to interview people with a digital camcorder and capture my questions in reasonable quality on location. I think I have only succeeded by 60%....not pleased with the microphone's sensitivity.
Two years ago I remember looking at two prototypes for broadcasters working in the field. One was the DT-790 which came with with a hyper cardioid microphone inside the gooseneck boom. That's for cameramen who want to shout commands or comments back to the studio.
But the one that interested me most, was the DT-797, which comes with a condenser microphone (cardioid) which, they say, has been developed to be used by commentators during live broadcasts (e.g. sport events) and reporters. I have since bought a pair and can say they are brilliant for work outdoors. I use it if I want to do interviews on a simple HDV video-recorder which has an XLR input. The other channel carries the signal from the wireless lapel microphone (a set from Sennheiser which still seems to perform well.
The headphones offer a frequency response of 5 Hz – 30 kHz, and the microphone boom can be used on either the left or right side or moved into standby (upper) position. The single-sided cable is available with different connectors which allow all necessary connections.
The price is around EUR 300,- (retail). The (standard) connectors for the DT 797 (the version with condenser microphone) will be a 6,3mm jack and a 3 pin XLR.
Tuesday, August 10, 2010
High Quality USB Mike Interface - Update & Review
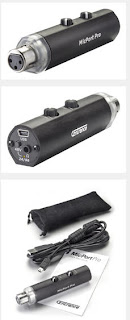
Two years ago I posted on this blog about a nifty little unit I saw coming onto the US market. Called the MicPort Pro, it is a small tube which allows you to connect an analogue microphone to the USB input of a laptop or PC (Mac or Windows). I still haven't managed to improve on it.
You may think that you can do that already with a Canon (XLR) to 3.5 mm cable plugged into the microphone input of your laptop. But, having used this device intensively for two years, the audio quality you get out of the external converter is vastly superior to the sound card in most PC's - even the Mac. The secret lies in the MicPort's USB microphone high quality preamp featuring 24-bit/96kHz performance. There is also a 48V phantom power inside the MicPort which allows me to connect an analogue Rode NT2 broadcast microphone (condenser) - and that wouldn't work if you just plug into the laptop. The results then are just superb, either for voiceover work or podcasting. The unit gets its power through the USB cable, so you need that connected for the microphone to get its power (if you're using phantom) and for the headphone monitor to work as well. Headphone output has no delay in it - essential if you are monitoring yourself speaking live.
The great thing about the unit is that it doesn't need special drivers for use on Windows 7 and Mac OS X™ audio applications. There's a little white LED under the Canon connector which lights when the computer "sees" the device. It really is plug and play (or more accurately - plug and record). MicPort Pro ships with a 2 metre long USB cable and a carrying pouch.
Users can download free software tools for recording and mixing from the CEntrance website. These are lite versions of professional software. Personally, I used my own software for mixing - Garageband or the Voice Over option in Final Cut Pro.
I found this unit to be ideal for a remote reporter-studio location in West Africa. That's because you simply plug this unit into the laptop and select it as the microphone source in Skype. Then you get (near-enough) studio quality contributions to live discussion programmes, providing the ADSL bandwidth is sufficient (and stable). So, as well as recording for a podcast, this unit is useful for live contributions.
The chassis is made of rugged aluminium to stand wear and tear - and being dropped a few times, and the casing will keep out the dirt and dust you find on travels. I still think it would be interesting if they incorporated a 4 GHz flash card inside the same metal housing (or slightly larger)- making it an instant competitor to the hopelessly outdated HHB Flashmic.
Stereo and multi-track recording is also possible with MicPort Pro thanks to the CEntrance Universal Driver™ that aggregates input from multiple MicPort Pro units with a very low latency (delay due to conversion) of less than 6 milliseconds. This means if you own several of these units, you can link them together on the same laptop, assuming you have enough USB ports.
So what about the cost? MicPort Pro prices, as of August 2010, show the average in the US is $149.95. I find the European dealers (in Germany for instance) are considerably more expensive at €165.41 including VAT (that's US$209 at mid 2010 exchange rates, down 50 bucks on the exchange rate two years ago, but still) and £109.99 in the UK (also including VAT). That said, I have no hesitation in recommending it.
More details on the recently upgraded CEntrance website which shows U.S. and international resellers.
Saturday, August 07, 2010
Sony Portable PCM-D50
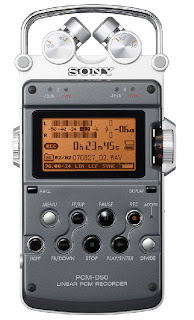
In music recording circles I often see this portable recorder recorder from Sony, retailing in the USA for just under US$600. To quote from the brochure...
The PCM-D50 is a 96 kHz/24-bit recorder fitted with two-position (X-Y or Wide) stereo microphones, 4 GB of internal flash memory and a Memory Stick Pro-HG Duo™ slot (for additional storage). The body of the D50 is constructed of lightweight metal (aluminum) and it's built rugged to withstand the demands of pro applications, plus it offers long battery life using conventional AA alkaline batteries. The recorder includes a USB high-speed port for simple uploading/downloading its native .WAV format files to/from Windows® PC or Macintosh® computers. Other unique PCM-D50 features include digital pitch control, dual digital limiter (inherited from the PCM-D1), low-cut filter, Super Bit Mapping®, A-B repeat and MP3 playback capability. To complement the D50 recorder, new optional accessories include a remote commander, tripod stand, and microphone windscreen. Additionally, the D50 offers compadible mounting and use with the recently introduced XLR-1 wide-bandwidth balanced XLR microphone adapter. There is also a 5 second pre-recording buffer
Not quite the PCM-D1 , but then it less than one third of the price. This development, along with the new Marantz are putting some competition back in the market. I believe this can only benefit the consumer. Note the 4 GB of internal memory. I was really disappointed that HHB in the UK just milked their Flashmic design dry and did nothing to follow suite.
Wednesday, August 04, 2010
Panasonic OnLine Museum
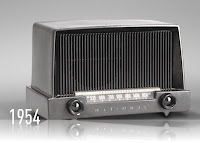
Bit off topic for this blog, but I'll mention it all the same.
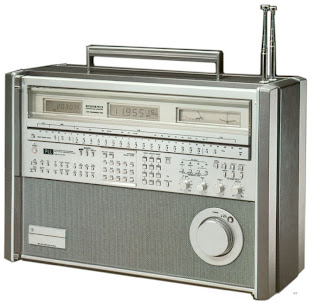
In the run up to a name change on October 1st 2008 (when they dumped the name Matsushita Electric Industrial and just become Panasonic), an on-line museum of design has opened. Not sure where in Europe it is coming from, but its an interesting selection of Panasonic designs through the last 90 years. During the time that I tested radios for Radio Netherlands "Shopping List" I recall that the Panasonic short wave portables were usually robust but not at the leading edge...perhaps with a few exceptions. For a time the RF-4900 with its digital frequency readout was a great tabletop and then there was the RF9000 (1982-1985) which cost something like 3000 Euros in its day and was basically designed to show what Panasonic could do in the labs. I am a bit surprised they didn't pick that for the on-line museum. It was an amazing set - I wonder what kind of customer they had in mind? In Holland they put a few into luxury yachts.
By the way, the museum is an interesting tour, but the navigation is a nightmare - Flash design on steroids. And sadly, no search, so the content is there, but the context is often missing. Worth a short visit though.
Tuesday, August 03, 2010
Manfrotto 560B Fluid Video Monopod with 234RC Head
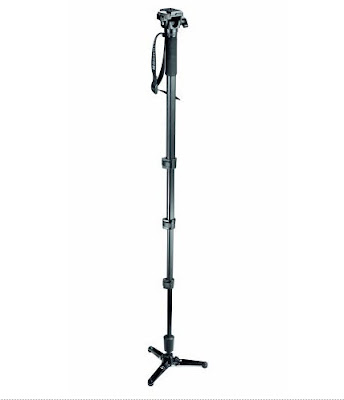
First saw this at LeWeb08 in Paris (a great new media conference held in December each year), I noticed several vpodders were using an unusually monopod. If you work in hi-def as I do, you quickly realise that camera shake is extremely annoying. It is SO important to be able to control the shots - and that means some form of camera support is essential. Even carbon-fibre video tripods are heavy and bulky if you're trying to interview people at conferences. So thanks to these people who showed me the Manfrotto 560B monopod, which retails in Europe at around 140 Euro (140 US Dollars in the US!). The mini "tripod" foot at the bottom is enough to stabilize most shots out in the field during conferences. Very pleased. Small enough to collapse into the camera bag.
Subscribe to:
Comments (Atom)

